Make your first edit with EventCatalog Editor
This tutorial takes you through the first successful editor workflow:
- Run EventCatalog locally
- Run EventCatalog Editor
- Open a catalog resource
- Make a small documentation change
- Preview the resource
- Review the Git diff
- Publish the change
The goal is not to document a whole architecture. The goal is to learn the editor loop.
This tutorial assumes you already have an EventCatalog project on your machine. If you do not, follow the EventCatalog installation guide first.
Prerequisites
Before you start, make sure you have:
- Node.js 22 or later
- Git installed
- An EventCatalog project containing
eventcatalog.config.js - Access to EventCatalog Editor through EventCatalog Cloud
- A terminal open in or near your catalog project
If a teammate needs access, an organization admin can invite them as an editor.
Check Node and Git with:
node -v
git --version
Start your EventCatalog preview
Open a terminal in your EventCatalog project and start EventCatalog:
npm run dev
By default, EventCatalog runs at http://localhost:3000.
The editor can still run without a preview, but preview links are only available when EventCatalog is running locally.
Start the editor
Open another terminal in the same catalog directory and run:
npx @eventcatalog/editor
The editor starts on http://localhost:3900 and opens your browser.
If the editor asks you to sign in, sign in with EventCatalog Cloud and return to the local editor.
Open a resource
Choose a resource from the left navigation. A good first edit is a service, domain, event, command, or query that already exists in your catalog.
The editor shows:
- The resource list on the left
- The resource documentation in the center
- Metadata and relationship fields around the editor
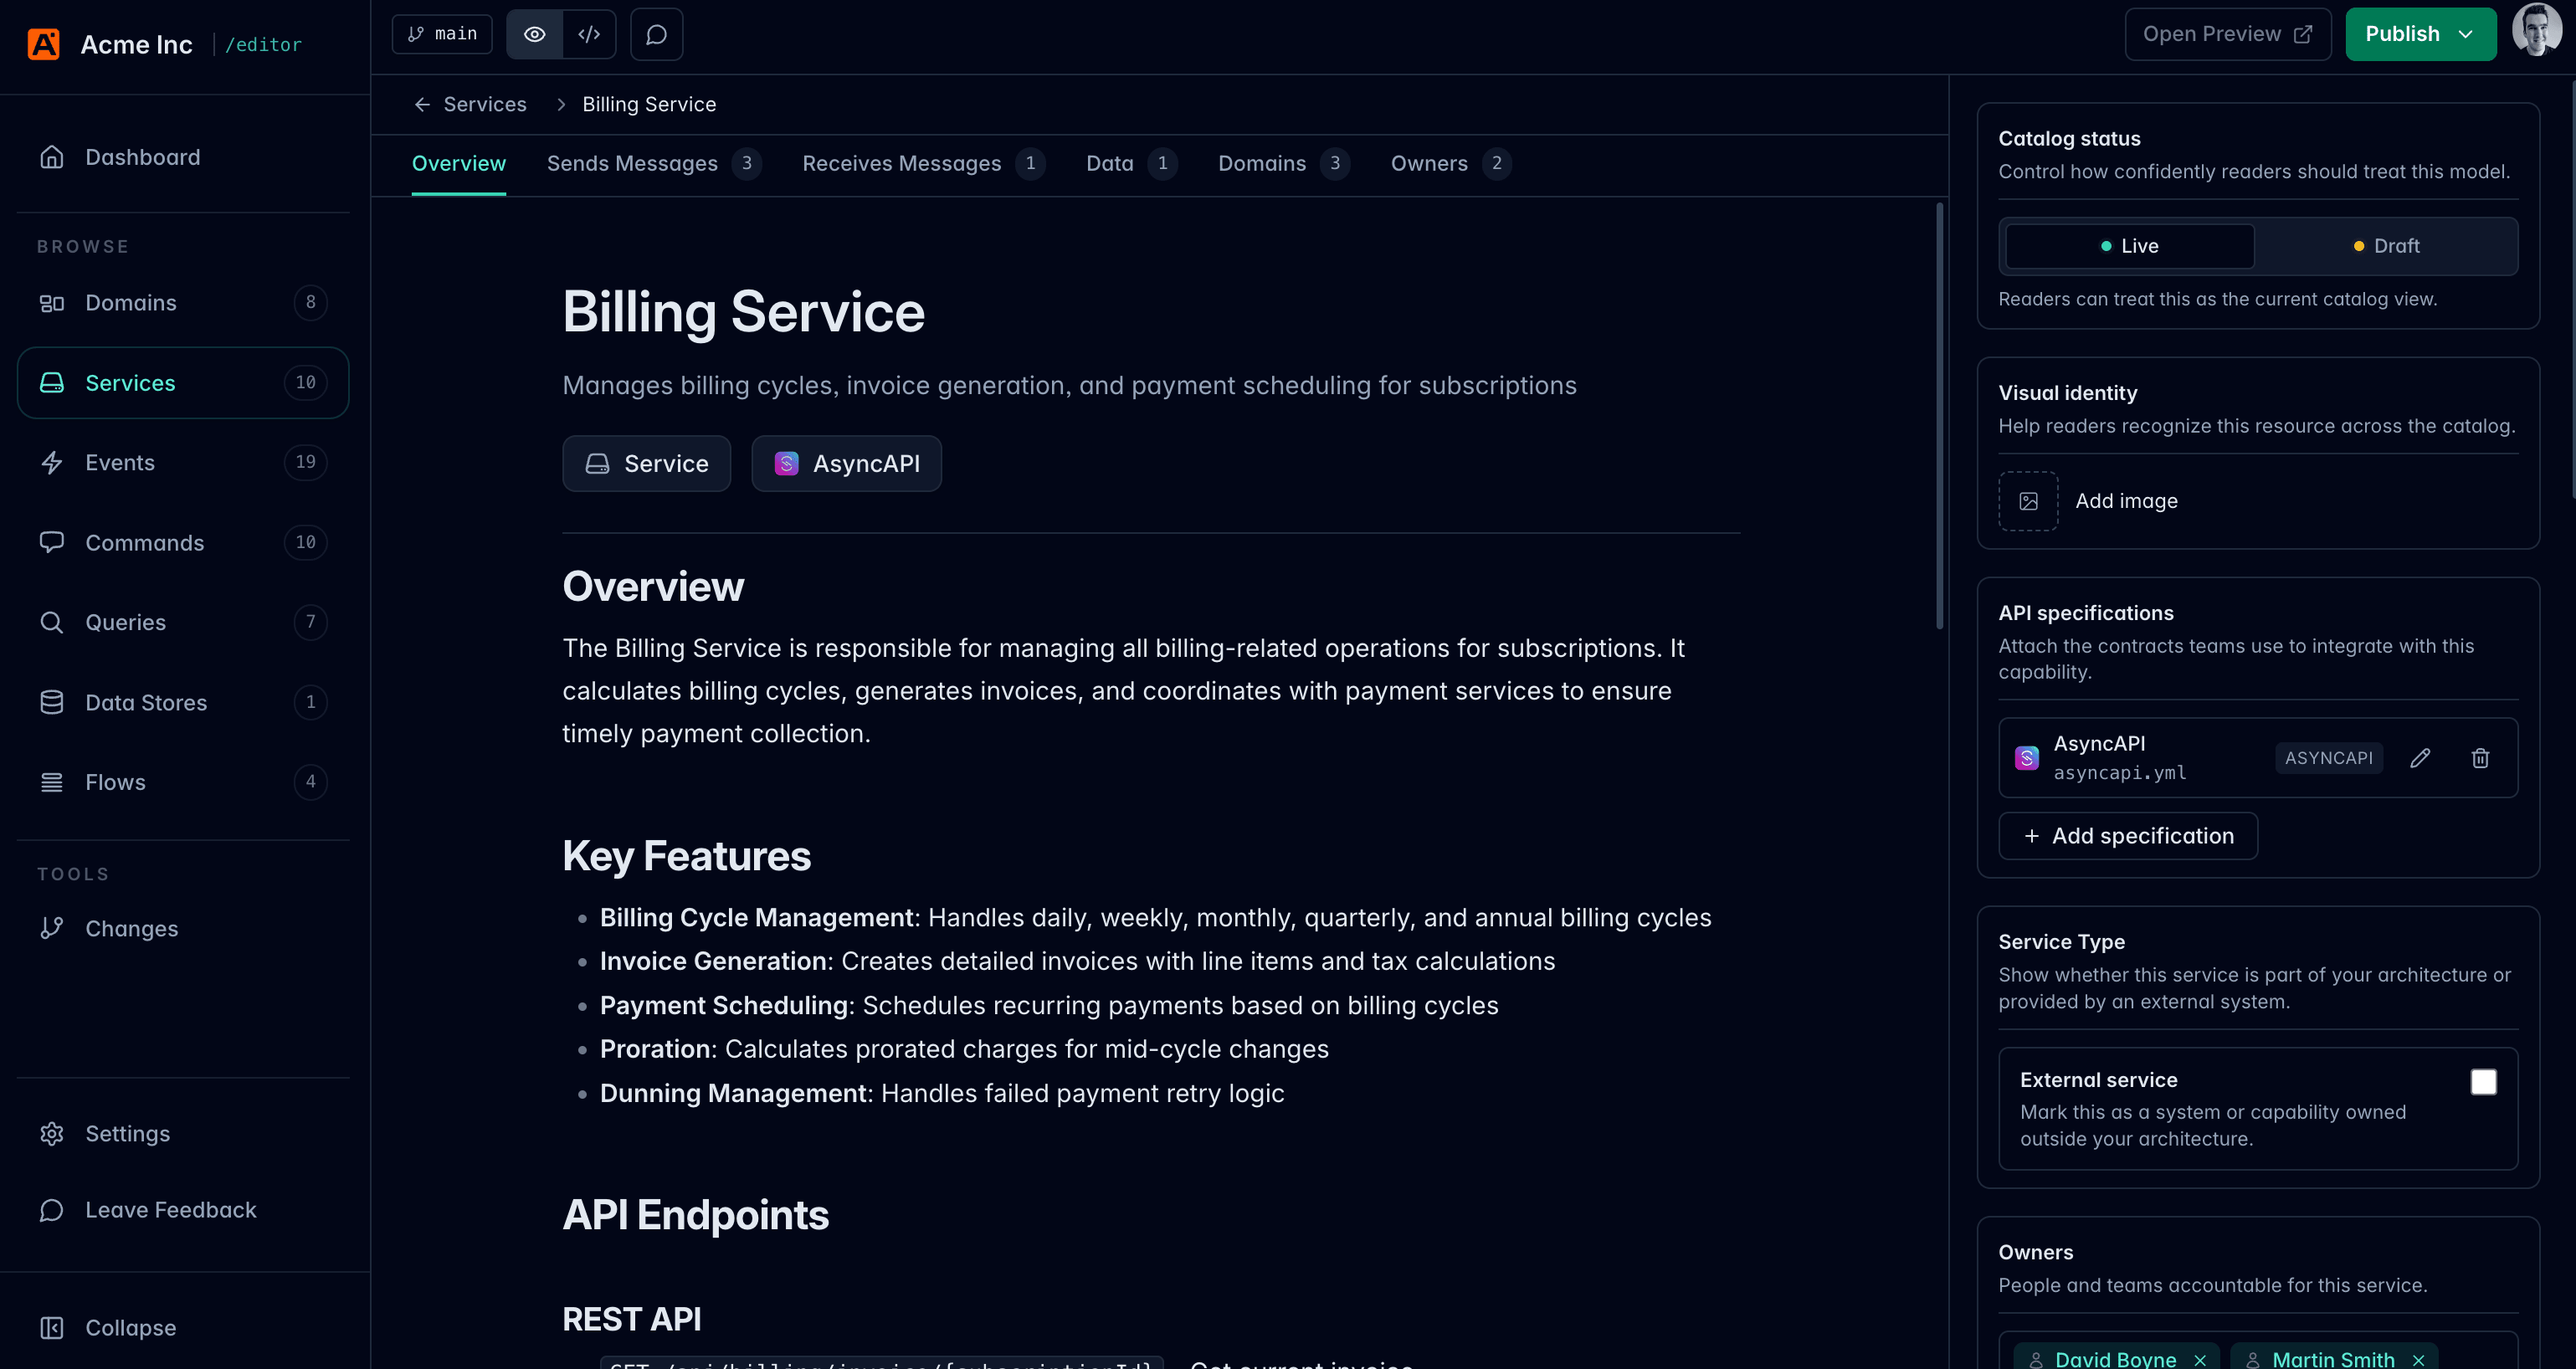
Make a small change
Change a short paragraph, summary, owner, badge, or other low-risk field.
The editor writes changes back to your local catalog files. For example, editing a service updates the matching index.mdx file in your catalog.
You can use the rich editor for normal writing, or switch to source mode when you need to work directly with Markdown, MDX, or frontmatter.
Preview the resource
Use Open Preview to view the resource in your running EventCatalog site.
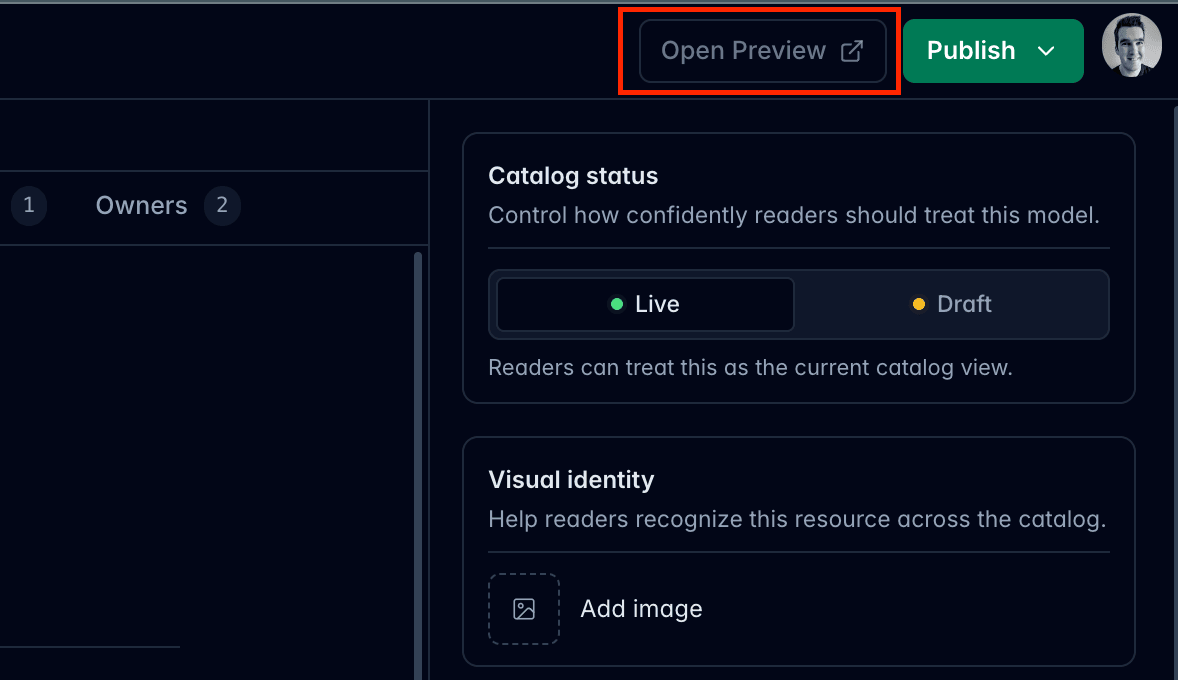
Preview opens the page from your local EventCatalog development server. If preview is unavailable, check that EventCatalog is running and that the editor detected the correct preview port.
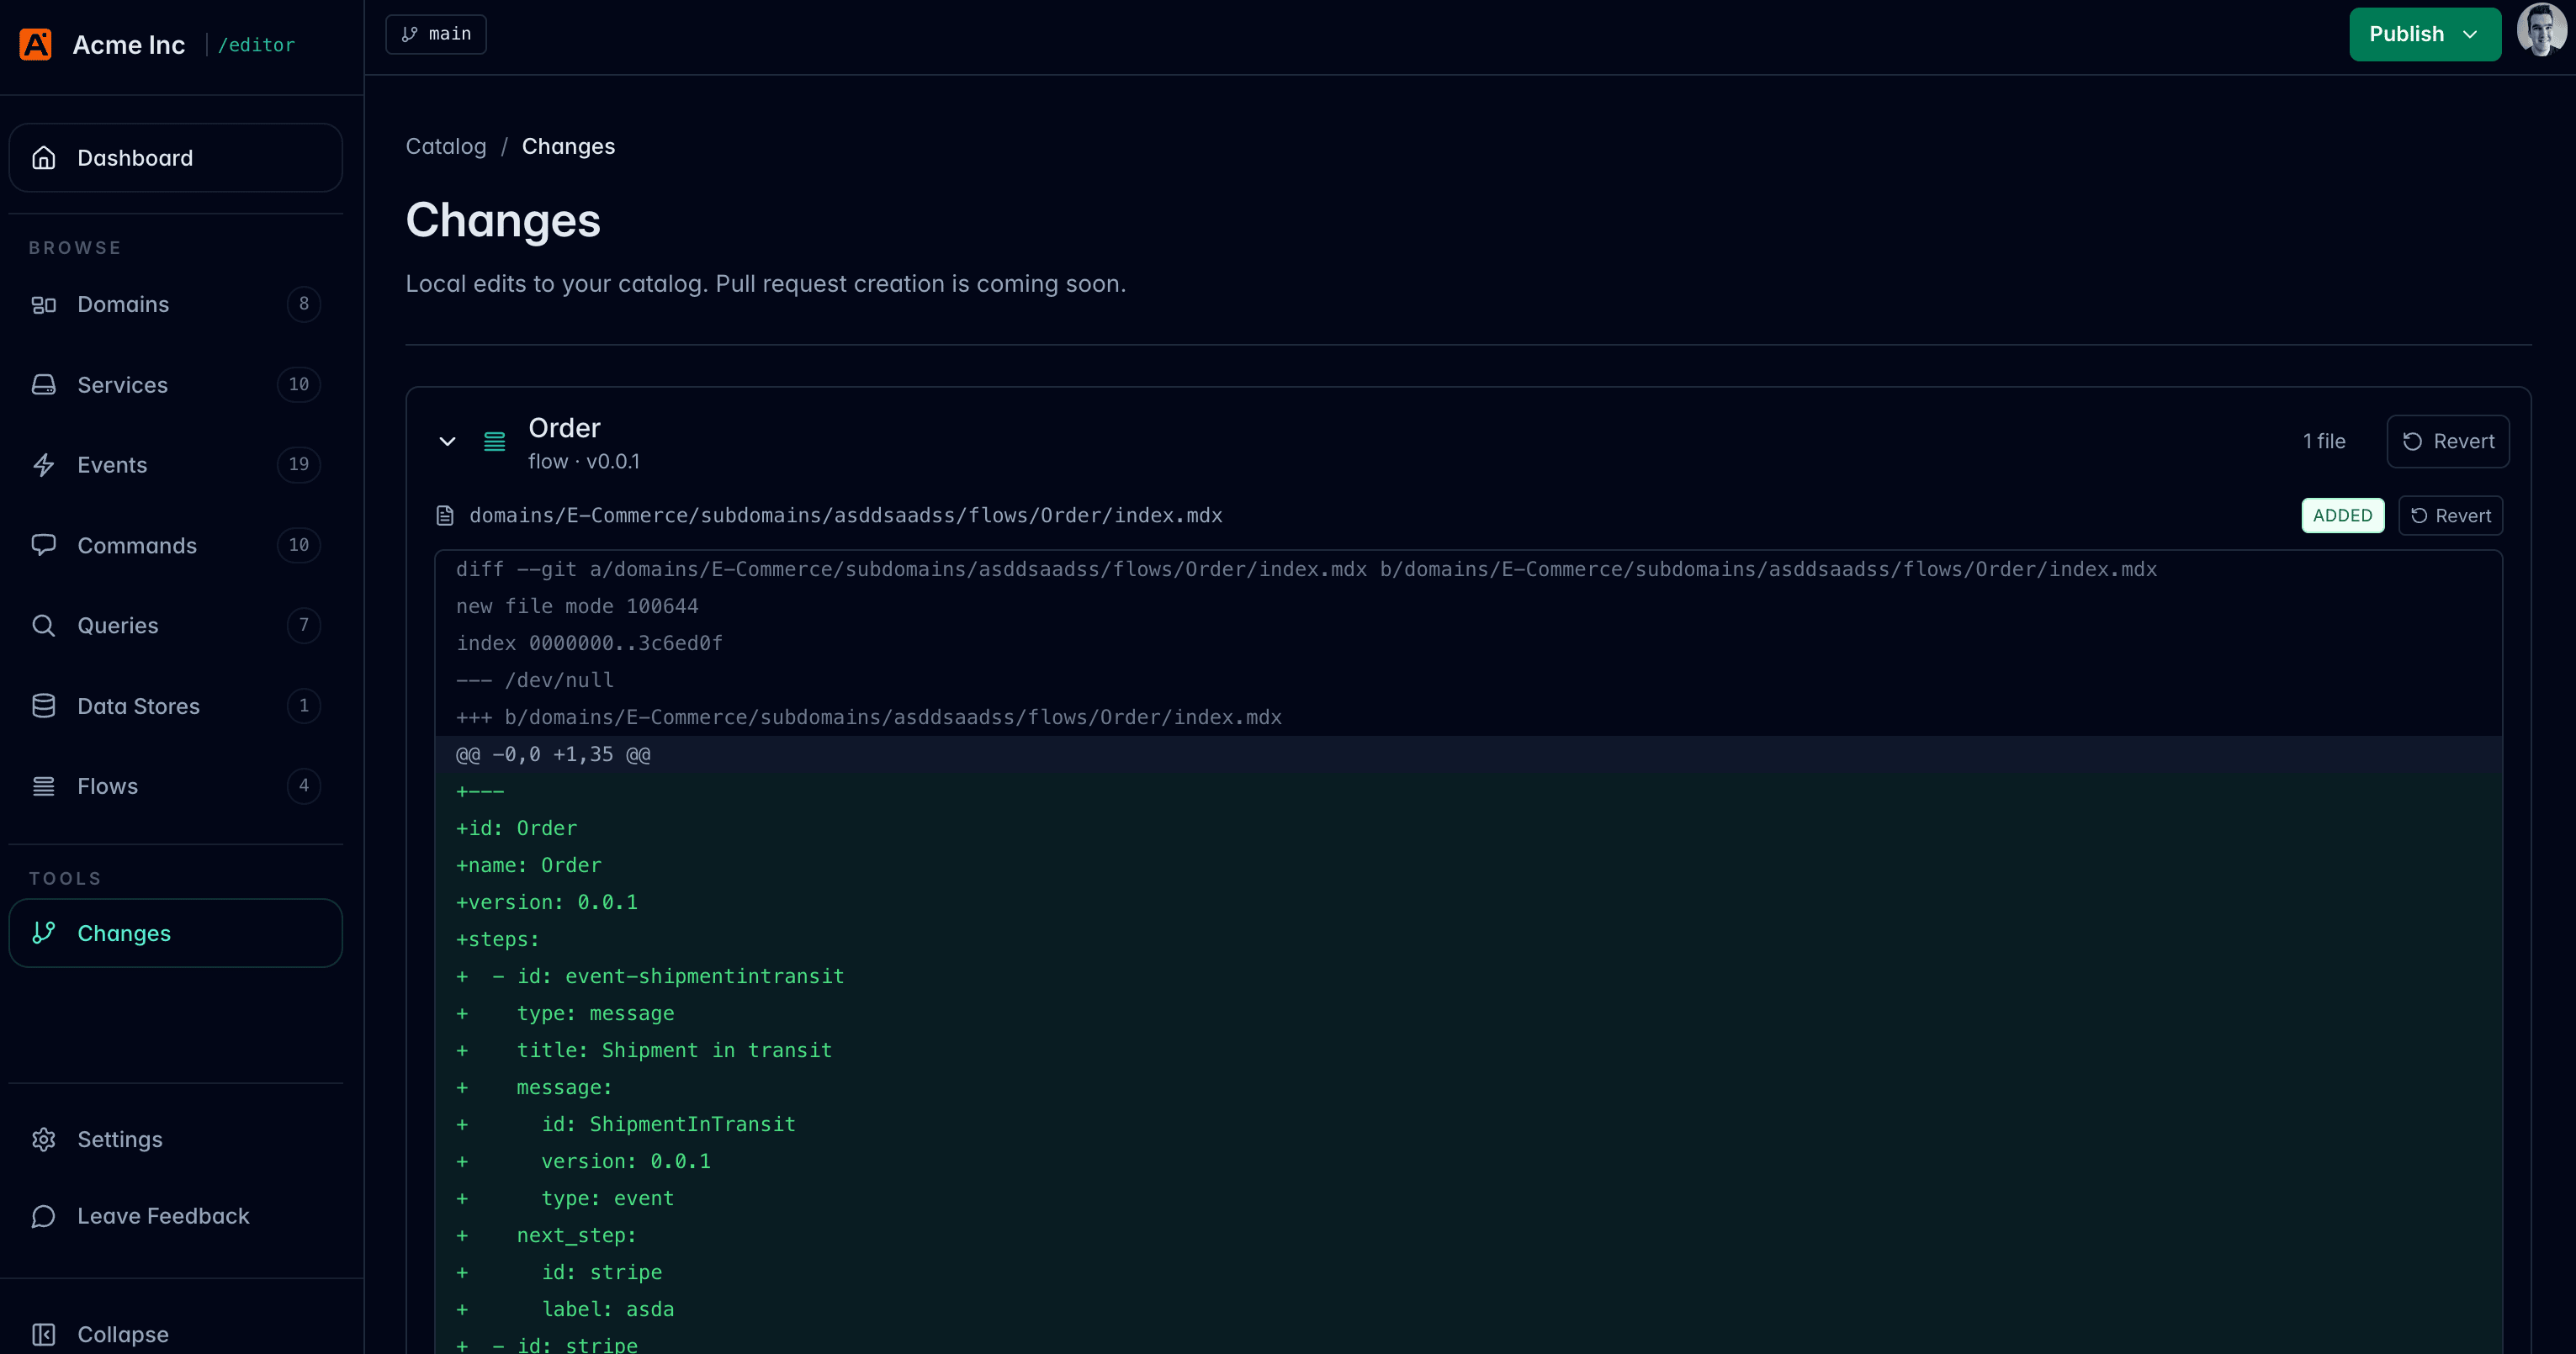
Review the change
Open Changes from the editor navigation.
The changes page groups local Git changes by EventCatalog resource. Open the changed file to inspect the diff.
Publish the change
When the diff looks right, click Publish in the editor.
In the beta editor, Publish commits your changes locally to Git. It does not deploy your catalog or open a pull request.
After publishing, continue with your team's normal review and release workflow. For example, you might push a branch and open a pull request, or push directly if that is how your catalog is maintained.
What you learned
You have completed the core editor loop:
- Open a local catalog
- Edit a resource
- Preview the resource locally
- Review the Git diff
- Publish a local commit
Next, learn how to edit resources, add schemas and specifications, or review and publish changes.